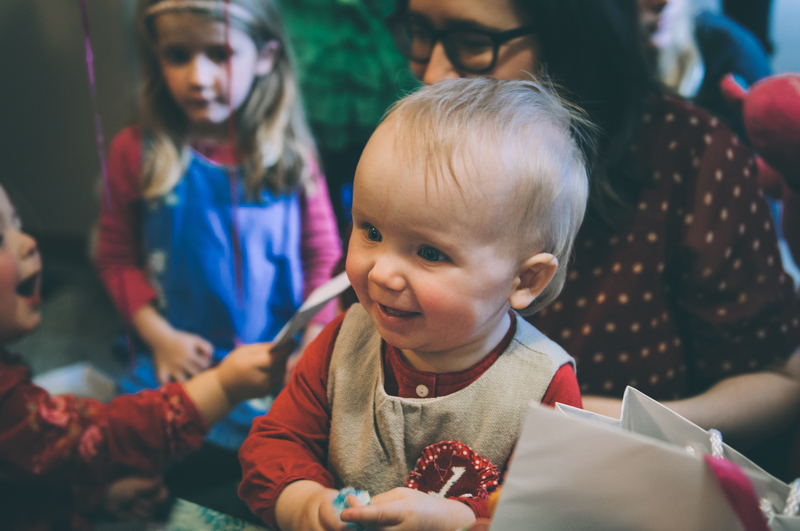
It has been an absolutely wonderful thing experiencing Claire’s first year – and seeing how much she has come into her own. She knows her mind and has a wickedly cheeky streak but she is affectionate and curious and smart. I love her so.
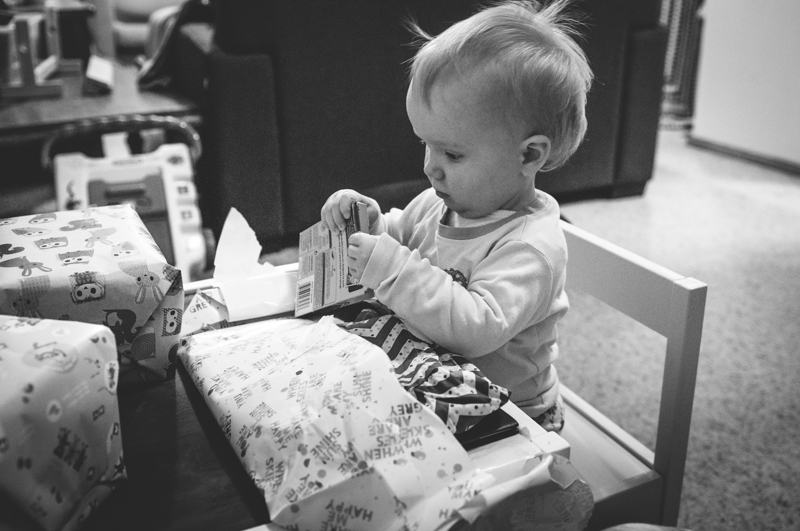
We had a truly lovely day on her actual birthday. Presents in the morning, with a new table and chairs to sit at and fun things to explore. Geoff was at work – but last day of school for the term, so he even finished early. Claire and I went out for lunch in the sunshine and I ordered her smashed avocado on toast. So weird ordering for a someone who is inevitably not going to eat it or will throw half of it on the floor – but you only turn one once. She LOVED it (being an avocado fiend helps). Tancks Corner is so nice. If you are in Melbourne’s outer north, it’s well worth a trip to Yarrambat, but you definitely should book.
Her party was planned for the day after her actual birthday. Which was a bit foolish in hindsight – we should have rolled with a Sunday afternoon instead of the Saturday – but hey, you live and learn. She also decided not to sleep before hand – that was fun. And we hosted at our house which was FAR too small for 40 guests. 2.30pm-5pm.
As I am an utter and complete Pinterest addict. I figured Claire’s first birthday was the prime opportunity to get my hands dirty and actually try a few things. I ran around in circles looking at themes and initially didn’t want to do a woodland theme as it felt overdone but came across other problems with my other ideas – a strawberry party in the middle of winter just doesn’t work and a few of the other options were a bit limiting. All the things I really wanted to have a crack at led back to and fit nicely with woodland. So woodland it was. This was my inspiration board for the party.
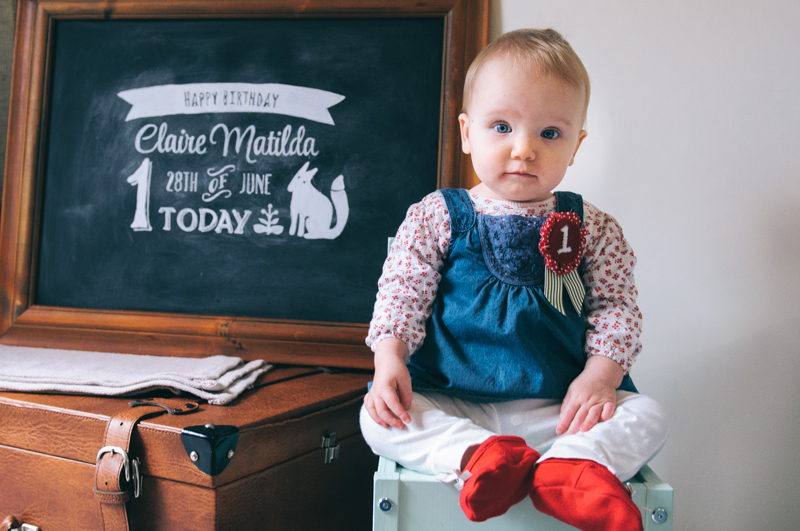
I spent a few hours here and there in the months leading up to it so I didn’t have to do it all last minute. This allowed me to try a few things I would not of had time to do otherwise. However the day before I did decide to give a chalkboard design a crack. I’d seen a few online and love a bit of good typography, it was also a chance to incorporate some of the cute little woodland animals/motifs I used on her invitations and stickers into some of the decorations. And I’m SO glad I did. It was quite stressful and I wasn’t sure it was going to work, but it looked amazing – beyond what I expected. It was a super cute way to photograph her to mark the occasion, especially as I still haven’t gotten around to doing a cake smash… hmm that’s right, I was going to do one of those.
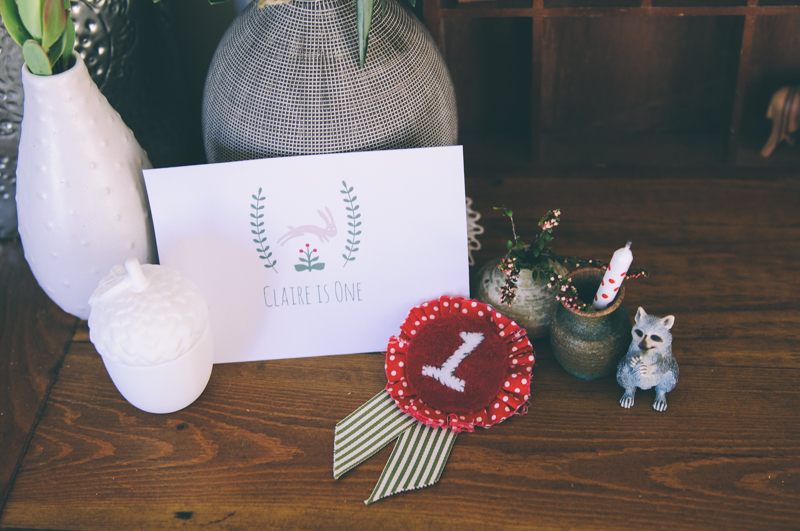
I made the pin she is wearing. I was inspired a bit by the pins shown at the top of Ivey Handcrafted (sorry not sure of the actual post they are on). But I used a combination of felt and a fat quarter and the ribbon which was actually bought for our wedding – 5 years ago. The number was also done in felt and stitched on. I had to improvise with a pin and used an alligator clip.
Chalkboard Design
Designed first in InDesign on the computer. The fox and plant were vectors I had purchased as part of a set that I used to make her invitations – no sense reinventing the wheel. I printed the design out big. Rubbed A LOT of chalk on the back of the design and stuck it down with duct tape onto the chalkboard. Trace with a pen (coloured so you can see it) you have to press REALLY hard. This gives you a faint outline. Then I used a chalkboard pen (bought from Smiggle of all places). Liquid chalk is permanent, so there is no room for mistakes. I then filled in the areas and cleaned it up. The chalkboard I made years ago from an old frame (opshop) painted with chalkboard paint… which you can also make using fine tile grout mixed with any kind of water based paint.
I used this tutorial from Indie Craft Parade for the transfer – but used liquid chalk to get the cleaner lines and I didn’t care about permanency.
The Woodland Party
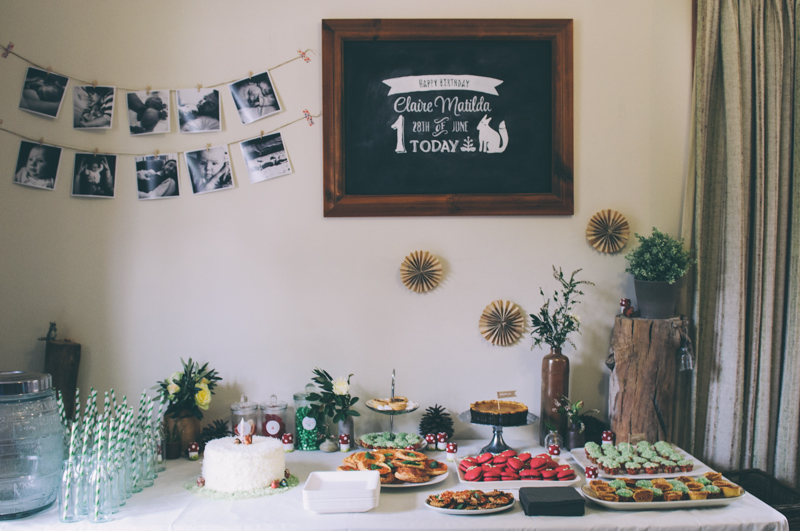
Bits and pieces and decorations
The little mushrooms – these were made from champagne corks (I bought a bag off ebay of about 40 of them). They were several coats of paint. Inspired by Heather Ross.
The decorative paper fans at the back were from a vintage book pages. Three pages accordion folded and taped together – blu-tacked to the wall.
The photo garland (there was more of this around the house) – were printed at Big W (of all places), they print square with a border. 5×5 in (I would’ve preferred smaller) and hung on jute twine with tiny pegs (eBay… but you can get them at $2 shops as I discovered later). I have thousands of photos of Claire. I printed 50 odd black and whites from various ages and they were hung in roughly chronological order. Inspired vaguely by this and a few other pins.
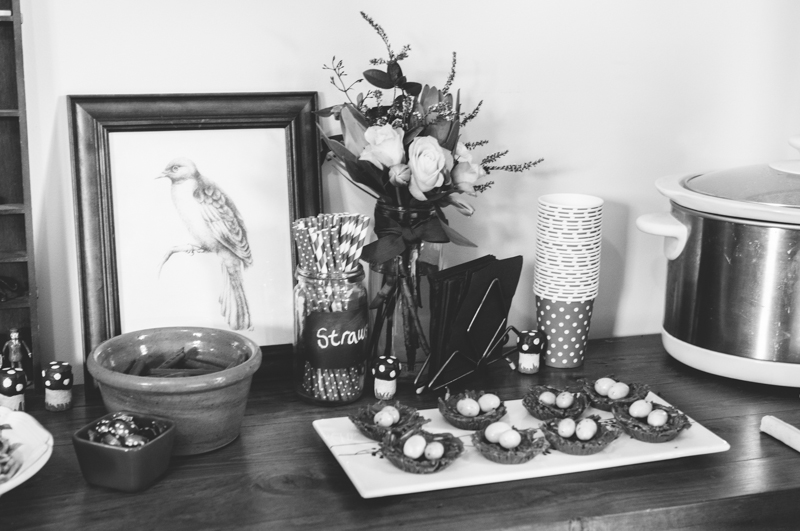
The little bottles – yes they are done lots, but they are cute. I am a tight arse so I bought Santa Vittoria fruit nectar bottles from Maxi Foods (amazing supermarket!) and drank/froze the nectar (I was going to drink it all before the day but you can only take so much liquid sugar, even if it is delicious), they turned out to be just over a $1 a bottle. I have kept them for future parties. They are almost double this to buy ‘party ones’ or about the same to hire. Why not own them. Stripey straws from eBay. Dotty straws from $2 shop. The drink canister was borrowed from Nicole (her wedding was beautiful – check out the gorgeous photos while you’re at it) but next time we might buy one as they aren’t very expensive.
The logs. I really wanted a log or two – especially to put the cake on but it didn’t happen. The morning of the party I went under out house to check the old woodpile and low and behold one chunky block. Not suitable for the cake but nice for getting some height.
The cake stand/pie stand are all ones I had or ones I borrowed from my mum. They all come from op-shops, along with various vases and jars.
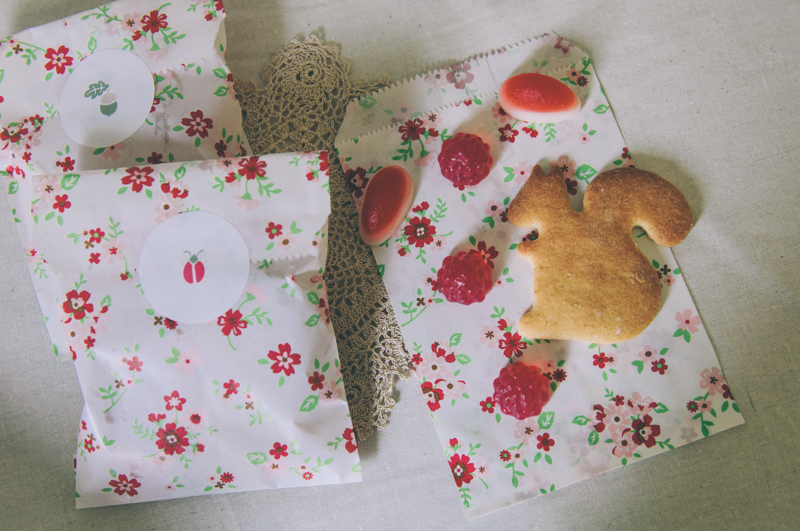
The lolly jars are from a $2 shop, left over from other parties I have hosted. The stickers I designed (if you can call it that) with some more of the vectors and printed them at MOO. These are the same stickers as on the lolly bags. Squirrel sugar cookies (cutters from Ikea) and some strawberry and raspberry lollies.
The lolly bags came from DAISO (everything is $2.80) but it’s unlikely they will appear again as their stock is always changing, I just struck it lucky. I also had donated (from my sister) nice stripey green bags which were meant to get filled with popcorn but it never happened in the chaos of hosting.
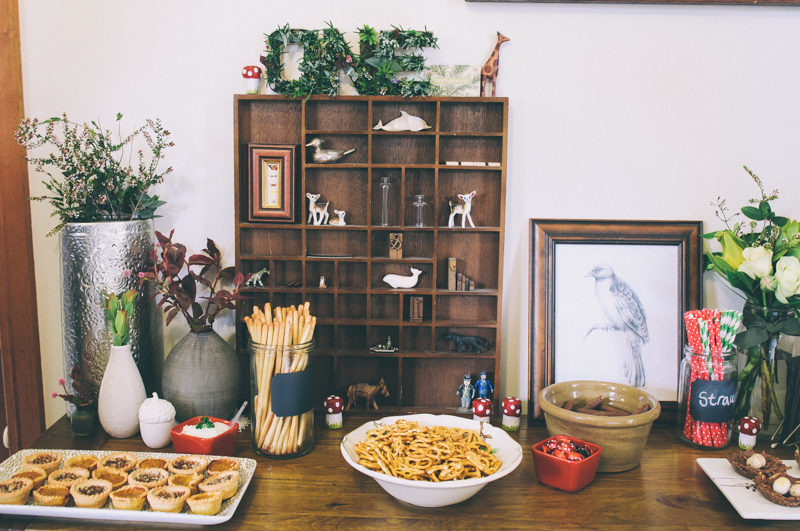
The ONE was a Pinterest experiment based on this tutorial from Urbanic Paper. Cardboard letters (mini) from Masters. I cut/ripped the fronts off them – so much easier than I thought they’d be. Stuffed them with florist foam and my sister Hannah filled them with foliage. She also did all the flowers. Check out Featherwood Flowers.
I made a banner from hessian and glitter letters too that hung out the front of the house (no photo!) based on this. But square and with uppercase letters. We had a few red and green balloons out the front too.
I also had a few other little things like some Schleich woodland animals. Chalkboard labels on the jars are from Officeworks – Martha Stewart brand. Pinecones from mum’s stash.
The Food
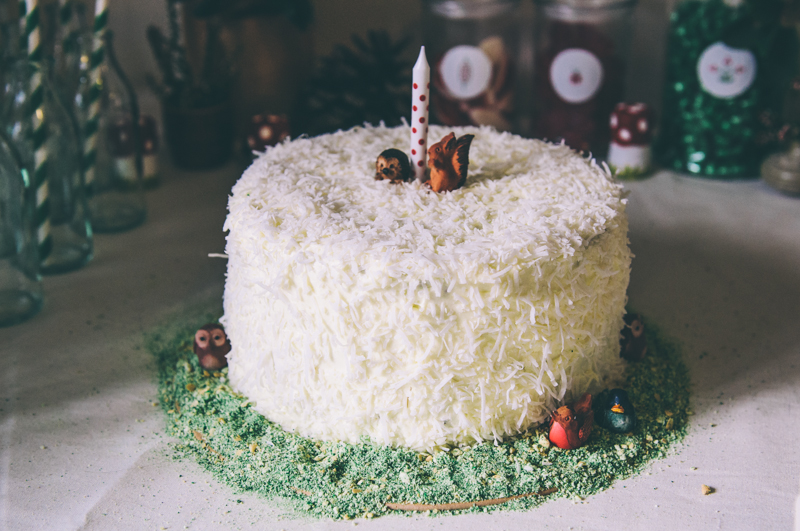
The cake was made my my very talented sister Emily. Chocolate and delicious. Covered in cream-cheese icing and coconut. The green moss stuff was left over from the cupcake topping I had made (I seriously made way too much) the little animals were pinched from mum’s shadow boxes, they are ceramic. The candle I bought a pack off eBay – spots and stripes.
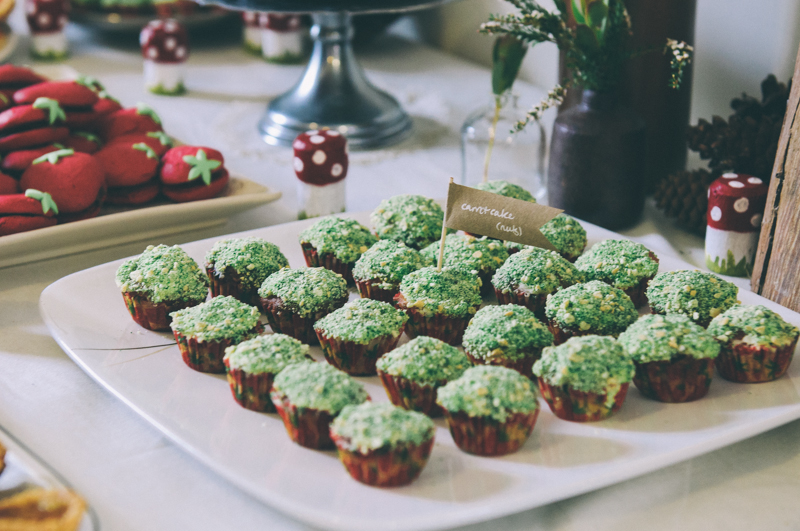
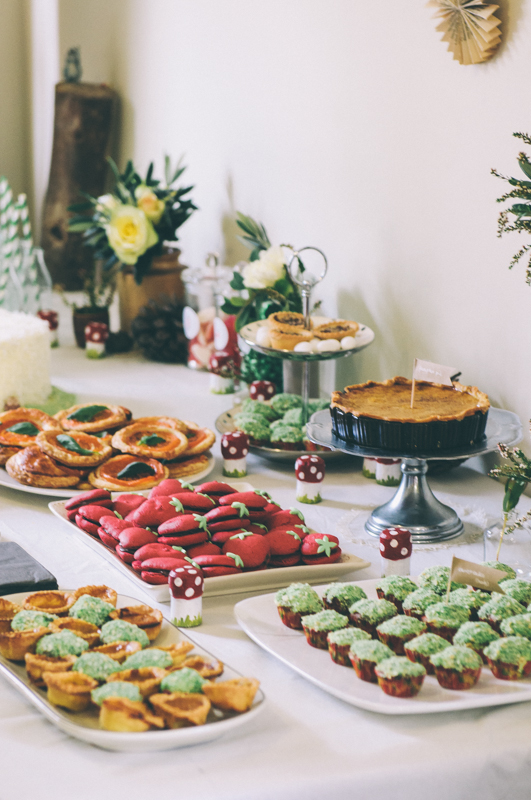
I made these mini carrot cakes based on my sister’s spectacular recipe. Super easy. Made three days prior. They keep amazingly, although at this small they did dry out a little more than a normal size cupcake would – which tend to just get better a few days on. Iced the morning of, with cream cheese icing. The green ‘moss’ was made from biscuit crumbs and green food dye the idea from here but as cinnamon biscuits sadly don’t seem to exist in Australia I just used good old Arrowroot. Strawberry cupcake holders from Spotlight.
My sister in law Anita made the strawberry macarons, they were apparently delicious – I sadly managed to get one onto my plate but left it to go and do something and it went rogue. Inspired by Little Big Company.
The mini pumpkin pies were made by yours truly. I have a minor pumpkin pie obsession and had these in my head to make before I even started planning. I did look at a few tips from Little Bit Funky. But wound up using my usual pumpkin pie recipe and store bought pastry. Made in mini muffin pans. The pastry was cut out with a scalloped edge cutter (from DAISO again). They froze spectacularly! There was enough to make a small pie too.
Tomato tartlets from Martha Stewart. So easy. Probably better hot but still super tasty.
I also had some store bought mini pecan pies, almond eggs, chocolate logs, chocolate ladybugs, pretzels (twiggyish) and other twig-like breadstick things. My other sister bought a fancy cheese platter – which oddly all the small children devoured before the adults to could get to it… and the adults all went for the Honey Joys (recipe on the side of your Cornflakes packet).
Mum made some birds nests. Like these ones. My mother in law also made some savory sweet potato bites.
The drink canister was just lemonade with frozen raspberries and mint. There was beer and cider and homemade mulled wine by Geoff.
So there you go. A woodland party. I didn’t have to spend an outrageous amount of money, just be a little creative and put in a bit of effort. I would have loved to have more time to photograph a few more details but as it happens, people start to arrive and it’s all go, go, go. Give me a party to theme rather than host any day! Happy to answer any questions or share recipes.
Thank you very much to all who helped us celebrate this rather auspicious milestone. Claire genuinely enjoyed her party after most of the guests finally left, such are the whims of a one year old!
